Tuesday, April 3, 2012

See you one the other side...

'The battle plan' before and after;
the MEP list from last weeks tasting.

There's a strange air that hangs in the kitchen the week leading up to a menu change. A discernable unease that comes with the impending unfamiliar. It’s something you can see in the face of your fellow cooks. The garnish chef that sets up his station the same way, service after service. Each container of MEP (mise en place) arranged in a manner designed for maximum efficiency. He’s a guy whose been shooting out the same dishes, day after week after month, and he just knows where everything should be in order for that to go as smooth as possible. That’s his set-up, his system for not ending up in the shit. May God have mercy on you if you try and mess with it. There’s the chef de-partie that places his orders five times a week. That’s checking the hotel’s occupancy for the week, looking at the events figures and checking kids in house with front desk. They’ll then use that information and to make decisions like, ‘Well there’s X amount of lamb in there so I’ll order Y for tomorrow and that should be fine to see us through the weekend.’ or ‘We’re really low on sweet potatoes, but it’s used for a low-selling dish so only X amount will still be enough until next week.’ This is the routine. The slog of the day to day running of a kitchen. Specials still go out on weekends or exceptionally busy midweek evenings, but by and large, the menu changes and then that’s it, the same 5-6 dishes that your section’s responsible for the next few months, until it’s time to change again. The ticket comes into the cook on starters and it reads, ‘terrine, two scallops, cured salmon’ upon seeing this, said cook then goes into an automatic routine of movements, a well-rehearsed pattern that is the result of shooting out each plate, with little variation, dozens of times a night for weeks on end. For this reason he sees the order and doesn’t need to think about what he needs to do in what order, he just knows. The same goes for everyone in the kitchen.
          The stress of these periods of change can unhinge a kitchen. If it’s been done well, when those doors open at 6pm the servers will have been well briefed on the new dishes, their components, how they’re prepared, what is suitable and unsuitable for certain allergies, etc. The cooks will have all their MEP in place, know through multiple tastings over the previous weeks (at times months) how the dishes are to be plated, how the components are to be prepared and executed and should soon fall into the groove and routine of the new dishes. They’ve had the dress rehearsal, this is opening night. But if it’s done badly *closes eyes and nervously runs hand over head as the memory of terrible events are recalled* if its done badly, the staff will turn up the day of the changeover and will never have seen the menu until then. Will never had been involved in the ordering, never had time to practice any new techniques required that were unfamiliar to them before, have no notes or recipe cards on the dishes components and (worst of all) never have ever seen or tasted the finished dish. Instead, the chef will spend the day barking at section after section, orally listing off garnishes and preparations that they’ll need for the service ahead. And when asked about how these intangible elements and MEP that you’re frantically preparing are going to come together, they simple dismissively wave away your concern saying, ‘I’ll show you when it comes in.’ In these conditions there is only one thing that’s going to happen. You, and all you co-workers that you’ve been sharing nervous glances with all afternoon, are about to have a really fucking bad night. I know because I had such a night, which I and everyone else spent being sworn at and avoiding airborne missiles that were aimed for us. That night was the beginning of the end of my time there. I would be gone within two months.
          Going into tomorrow I’d like to think we’re in the former. We have an idea what the deal is and the alarm’s been set a little earlier so we should have enough time to get everything in place for service. But it’s because of the above that new menu time has everyone on edge. That’s why as I write this I’m on edge. Because for me and the rest of the team, that time is tomorrow. Because we’ll be prepping our MEP and be thinking, ‘Is this enough of this item? Am I doing this right? Where’s the best place to put this on my bench?’ this and a dozen more questions of anxiety. The same goes for ordering, we’ve no idea which dishes which sell. We can guess, but it’ll be a few weeks before we’ve got it down. Before that it we’ll either be smashing a dent in our food costs because we over-ordered and over-produced a dish, or face an annoyed dining room and an irate chef coz, ‘who knew on a busy Friday that everyone would be in the mood for Salmon?’ But this is all copper coins to the gold nugget of stress that is, the first service. As with the starter cook, everyone in their section was working on unconscious knowledge. They weren’t thinking about what they need to do, before the plate can go, they know. But tomorrow cooks will have copies of the menu on their stations, photos for last week’s tasting will be printed and handed round like targets to a group of hit men, a chef will discreetly pin lists of each dish’s garnish to their docket slide like cheat-notes. That first service you’re working blind. Unconscious ignorance, you don’t know what you don’t know. And tomorrow we won’t know shit until that first table comes in.


Photos from tasting;
Top: the passe after plating starters.
Middle: the bench where I'd been prepping all day.
Bottom: 'like it never happened' cleaned down, next week it's
for reals...


Saturday, May 21, 2011

All Hail Oxtail, Kale and Homemade Pasta


Red Wine Oxtail with Tagliatelle, Kale and Mushrooms


Standard blogger protocol dictates that after an extended lapse of posting, the first few sentences of the post that ends said lapse should be spent giving reason as to the how’s and whys that caused it. Anyway.

I think I’m wrong in saying that nothing shouts ‘sexy’ like a cut of meat that’s spent its life at the business end of a quadruple-stomached herbivore. And also that nothing quite signals the arrival of summer like a serving of braised, rich red meat accompanied by various forms of starch. Of course, neither does. But personally I’m not one to restrict foodstuffs to a time of the day or year. I mean, cereal still tastes good at and a kebab is just about okay when you’re sober. So just because the temp’s skipped up a few degrees and the sun isn’t covering itself like a fat girl on a beach, why should ‘stewing’ suddenly be tut-tutted over?

In an ideal world making a dish should always start with one step; choose the product you want to focus on (e.g. pork, salmon, lamb, cheese, etc.) and build the dish around that. I say an ideal world because whenever I end up cooking at home its more like;
Step 1: Open Fridge
Step 2: Spend 10 minutes determining which contents are actually edible.
Step 3: Desperately scratch head.
Step 4: Prepare to get really fucking creative.

Thankfully in this case it was the former. In this case it was oxtail. Oxtail’s pretty hard to come by and even in decent butcher shops it’s somewhat of a rarity. So imagine my surprise when I spot it, not in the meat counter of some uber-trendy specialist foodstore, but my local Tesco. I considered it almost a dare and when 750g cost less than a fiver, well it was on like Donkey Kong. Oxtail is exactly what it sounds like, not like those ambiguous cuts like brisket or blade that you couldn’t tell what part it was without the aid of a CSI-style wall chart. It is the tail of a cow, which consists of a jointed bone that runs through it and tough muscle that surrounds it. This muscle allows the animal to raise and swish its tail for reasons that have no need of explanation. As a result this is definitely a cut that is treated with the ‘low and slow’ approach. Because if you think that this is going to be anything approaching edible after less than an hour of cooking than you will be certainly needing to ensure that you’ve the evening set aside for some prolonged and uncomfortably chewing. Not to mention an up to date dental plan. The upside of this is that it is chock full of the kind of fat, cartilage and connective tissue that guarantee, when treated right, all kinds of succulent awesomeness. Also you get bones, and yes this is a good thing. As they have the ability to impart flavour like no-man’s business, after all it’s what used to make stock so why wouldn’t it make you’re Sunday dinner better? Also they’ll protect the meat they’re attached to, keeping moister as it cooks. So yea, bones are good.

Once I had it bagged and tagged I then had to start thinking about what I was gonna put with it. A walk through the veg aisle later and I spot curly kale on special offer. Everyone knows that wilted spinach with pretty much any meat is a winner, but though less used, kale still deserves a shout out. It’s like the girl at the bar surrounded by her much hotter friends. That while not seemingly the most attractive choice, gives it up in spades after just a Jagerbomb and a positive comment about her glasses. In other words; minimum effort, more than satisfactory results. I then (currently writing in the knowledge that that misogynistic analogy has probably turned away all female readers) had the idea of shredded oxtail, bright green kale, all tossed through pale yellow tagliatelle. A few days later I was explaining this dish to one of the chefs in work. ‘Slow cooked meat in a pasta dish, a bit unusual isn’t it?’ they said. ‘Oh, and Spaghetti Bolognese is what exactly?’ I replied. They thought for a moment before obediently leaning their head forward to within slapping distance.

It is definitely one of the ‘slow cuts’, so even though I’d never actually cooked it before I still had a decent idea of how to get the best from it. Because as I’d said in my [Pork Belly] post, once you know how to deal with one such cut, the others all fall into the same basic preparation. With this I decided a slow braise with mushrooms, bacon and garlic, all swimming in a good load of red wine. Because what liquid doesn’t suit that list of ingredients better? I also decided that I’d really make an evening of it so decided to make my own pasta. A task that some cooks dread and fear like a visit to the headmaster, that just happens to also be your dentist. But while admittedly the first time is always a drawn-out, somewhat painful and potentially embarrassing experience (and the same can be said for making pasta, ow, don’t touch me coz I’m on fire!) I find it be a relaxing and rewarding exercise and while it takes a bit of practice, there’s few moments as rewarding as when you serve up your first batch of competently made ravioli. I'm not going into too much detail as a detailed method on making homemade pasta is almost worthy of a post unto itself.

Red Wine Oxtail Tagliatelle with Kale and Mushrooms

The Braise:
3 large cuts (750-800g approx) oxtail
5-6 button mushrooms, roughly chopped
2-3 rashers of bacon, roughly chopped
1 large sprig of thyme
2 red onions, roughly chopped
6 cloves of garlic, roughly chopped
1 tbsp tomato puree
1 very large glass of red wine
300-500ml of stock, but water would be fine

  1. With a sharp knife remove the layer of fat around the outside of the cut.
  2. Heat a pan until hot and add oil. Season oxtail pieces well with salt and pepper and sear until all sides have some colour.
  3. Remove and set aside. Add bacon and fry until it begins to colour.
  4. Add the remaining dry ingredients and sweat for a few minutes. Then stir tomato puree through.
  5. Pour in the wine and let reduce by half.
  6. Add water/stock and bring to boil.
  7. Remove from heat. Place oxtail cuts in a baking dish and pour the bacon/veg/wine pan contents over and around. Ideally the meat should be covered by ¾’s.
  8. Cover with a lid or tinfoil and place in an oven at 140 degrees centigrade for three hours.
  9. When done remove from oven and let sit (still covered) for at least half an hour.
  10. Remove meat, and separate from the bone. If this is difficult more cooking is required as it should pull away easily. Roughly chop and place in a bowl with a few spoonfuls of the sauce and cover to keep moist. Strain the remaining braising jus.
Pasta dough
250g strong flour
2 whole eggs
2 egg yolks
1 tbsp olive oil
1 tsp salt
1 tsp ground tumeric (for colour)

1.      Place all dry ingredients in a mound and shape so there’s a ‘well’ in the centre.
2.      In a bowl roughly mix the egg and oil together and pour into the well.
3.      Starting slowly, start bringing in the dry ingredients and begin to work into a dough.
4.      Knead for a couple of minutes before placing in the fridge.
5.      Ideally do this when the meat goes in the oven and then it’ll be ready to roll when the meat comes out.

To Finish (per serving)
Reserved Oxtail
Reserved braising jus
Pasta dough
3-4 button mushrooms, finely sliced
2 rashers of bacon
Half red onion, finely diced
2 cloves of garlic, finely diced
1 sprig of thyme, finely chopped
Half a glass of red wine
1 handful of kale, stems removed and roughly shredded
Grated parmesan to serve

  1. Put a large pot of salted water on to boil.
  2. Tear off about a quarter of the pasta dough and roll through the machine, starting at the widest setting then changing to the next one down after each ‘roll through’ until come to the thinnest setting. Dust lightly with flour and roll the sheet as you would a Swiss roll. Cut into strips of desired thickness. Leave to dry slightly as you prepare the rest of the dish.
  3. Heat a frying pan until hot and fry bacon with a little oil until lightly browned.
  4. Add mushrooms, onion, garlic and thyme and sweat for a minute or two.
  5. Pour in wine and reduce by at least ¾’s.
  6. Add about 100ml of the braising jus and about 100g of oxtail. Bring to boil, add water if necessary. At this point put the pasta into the boiling water, as it’s fresh it’ll cook very quickly, mine was al dente within a minute.
  7. Toss kale into the sauce, should start wilting soon after.
  8. Once the pasta is al dente, using a tongs, fish out the pasta and place straight into the pan with the sauce. Toss through for one-two minutes.
  9. Spoon out onto serving plates with freshly grated parmesan.
  10. Give self the mother of all back-pats.

Monday, March 28, 2011

From the Crack-Addict Cookbook: CocoPop Pannacotta with Rice Krispie Praline


Coco-Pop panna cotta, rice krispie praline, apple, oranges and
coffee granita (not pictured, my bad)


'What's this?' I hear you say. 'Two postings within a week. Why Ambassador, with this blog you are really spoiling us!' To which I reply, 'Yes, yes I am.' Truth is, the reason for the update is not due to an abundance of generosity, but that even more illusive nugget that is: free time. Due to some cock-up with holiday pay and hours owed I am, for the second week in a row, enjoying four days in a row. So if fad has not faded to the point of uber-lame, allow me to declare: winning!

I swear I was not high, nor under the influence of anything unsavory when I came up with this. Nor was I in the depths of 'the day after the night before' whereby the mental filter that would determine whether or not an idea is 'decent, worthy of noting' or 'plain batshit crazy' would be on the blip. No, the most worrying aspect of this post and the recipe it contains is that I was of totally sound mind and body the day I came up with this. The only thing more unsettling than that bit of information is this: the dish itself, it actually kinda rocks.

It started as a simple thought that snowballed into something that became equal parts delicious and demented. Essentially if you were to give it a pretentious synopsis you would say it's a playful deconstruction of breakfast with a sprinkle of nostalgia. It was a Sunday in work and despite the busy night previous I had steamed my way through the prep so found myself in the rare position of not really having that much to do. This is a dangerous thing, you see, the thing about being a chef is that your time pre-service is spent just getting ready for it. So matter how busy or quiet it is, that's all you're focused on, that's all you care about. But with the mental blinkers of preparing for service now removed I look around and, as if for the first time, find myself surrounded by stoves, cookers, equipment and an insanely well-stocked pantry. 'Well-well,' says the culinary Loki on my shoulder, 'whatever shall we get up to now?'

Seared scallops with beurre 'vert'
Some interesting stuff has come out of these little sessions. The skin cracker with sous-vide chicken from the last post was the latest. Another was the idea of blending softened butter with spinach to give it a vibrant green colour, when cooled and set, this was then incorporated into a buerre blanc (technically making it a buerre vert) sautéed bacon, peas and herbs were then stirred through. Served with sautéed scallops it was total killer. However not everything has worked out as well. I'm still haunted by The German's face wrinkling in disgust, and then promptly spitting into the nearest bin, my attempt at pickled samphire. However this desert proved to be a step towards redemption.

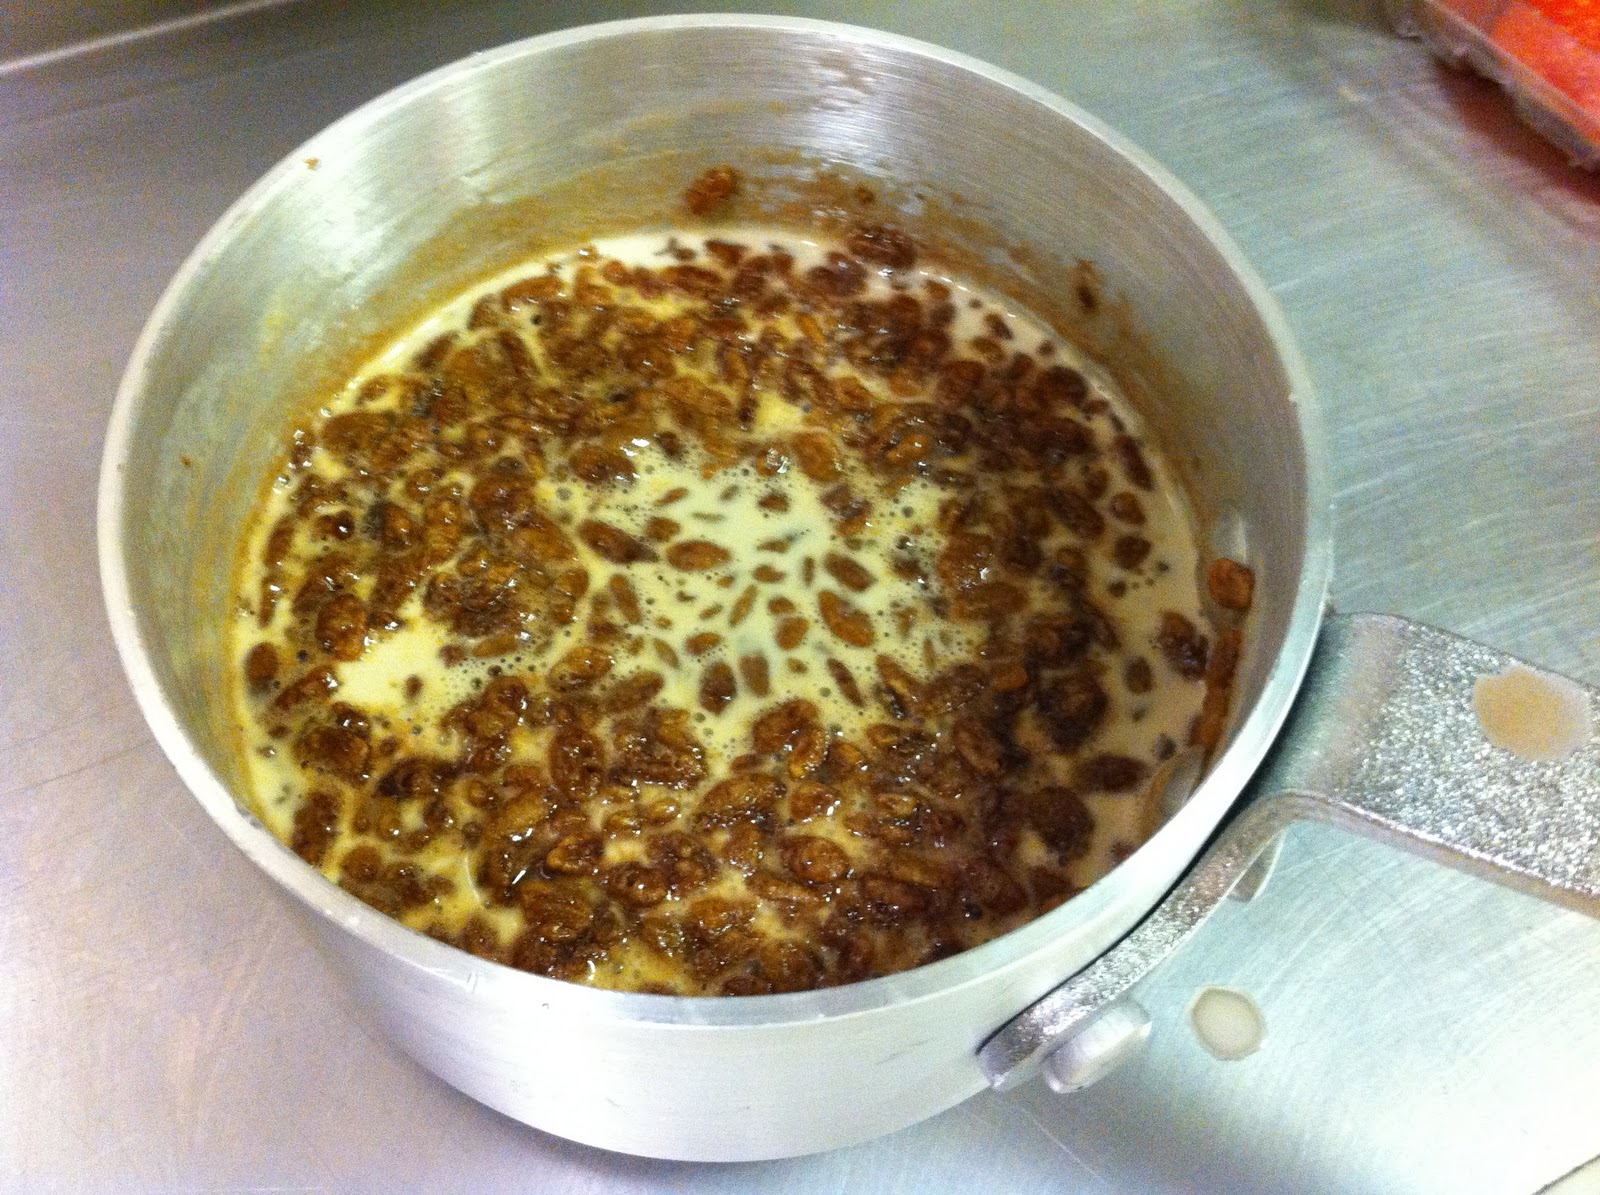
I was getting a cup of milk from the dispenser in the service area of the kitchen where a majority of the breakfast items are stored. One of these is a multi-drum cereal dispenser. As I stood there drinking my milk and looking at this drum I saw one of the cereals were Coco-Pops. A waft of nostalgia crept through and I remembered that when I was a kid the best part of having a bowl of Coco-Pops for breakfast was finishing the cereal but still having a half-bowl of chocolaty milk with a slight malt flavour left to slurp through. 'Mmm, good times.' I thought and turned to go about the rest of my day. But then I remembered David Chang doing a panna cotta flavored with Corn Flakes, and that was it. As in that moment I realised there was no way I could on living my life without trying this!

Infusing the milk/cream with Coco-pops
The result is panna cotta infused with Coco-pops. I then started thinking about what to put with it. The panna cotta is soft and smooth so I knew I needed crunch. So keeping the breakfast cereal theme and I made a Rice Krispie praline. Sweet and sweet, now I need something to brighten it up. I went with two fruits that are commonplace at the breakfast table, oranges and apples. In this case, diced raw apple mixed with some fine orange zest. A line of toffee sauce for decoration and works well with the praline. And finely, when I saw I had a good range of textures I decided I needed a change in temperature, so to thematically bring it full circle a coffee granita. Granita is basically a sorbet that hasn't been churned, think of a dry slushie, or flavored snow.

Rice Krispie praline cooling
I got The German to try it, after his initial reaction which was to introduce random drug-testing in the kitchen, he took a spoonful and tasted. Then something happened. Something so rare and fleeting that some would question if it even occurred at all. The bastard actually smiled.

Coco-Pop Panna cotta, Rice Krispie Praline and Coffee Granita (not pictured, my bad)

300ml cream
200ml milk
1 cup approx Coco-pops
2 tbsp sugar
2 leaves gelatin, softened in cold water

100g caster sugar
1/2 cup Rice Krispies

2 cups of lukewarm espresso
30g sugar
  1. Place the milk and cream in a pot and heat until warm, but do not boil.
  2. Remove from heat, pour in Coco-pops and stir. Let infuse at room temperature for twenty minutes- one hour.
  3. Strain well, return to stove and heat again until warm. Add the sugar, squeeze excess water from gelatin and add to pot. Stir to dissolve.
  4. Pour mixture into desired moulds, place in fridge to set.
  5. Put sugar with a bit of water in a small pot and place on a high heat.
  6. Heat until it caramelises to a dark amber colour, remove from heat and stir in Rice Krispies.
  7. Spoon out onto a tray covered with a layer of baking parchment. Be careful as the mixture is insanely hot. Allow to cool at room temperature.
  8. Break into pieces and pulse roughly in food processor. Store in airtight container at room temperature.
  9. Stir sugar until dissolved in coffee.
  10. Place in small, shallow container and freeze.
  11. Before serving take a dinner fork and scrape over the mix.
  12. To serve (as I did anyway but don't take as gospel) sprinkle a line of coco powder on your plate. Draw on two lines of toffee sauce at an angle to this. Remove panna cotta from mould and carefully place onto the line of coco. (mine were pretty stubborn so I had to dip the moulds in hot water, which, while successfully freeing them, started to melt the edges. Hence why the one pictured looks a bit deformed at the end)
  13. Sprinkle the praline on top of the panna cotta and place the diced apple and orange zest around the plate.
  14. Finally remove granita from freezer and place a small spoonful to the side.

Quick Notes About Previous Posts

In my last post in which I preached then pros and virtues of sous vide cooking, I banged on about how it allowed uniform doneness when cooking meat. Yet some of you may have noticed how the heading photo which was meant to show it off was taken in a way that didn't really, well, show it off. That's because I was having problems with my meat (and not for the first time) I'd home-vac my steak, put it in and when it'd be done I'd remove, sear and slice it. Yet instead of revealing the sweet-sweet uniform pink I was promised and hoped, I was rewarded with a manky shade of grey. Now while the exterior will always oxidize to a degree, this is unavoidable, having it oxidize internally is unheard of. Numerous searches online revealed nothing. For all intensive purposes this problem has never been encountered. So I varied, well, everything trying to find out what was causing this. From different ways of sealing the bag, to cooking with different liquids in the bag (thought maybe high-acidity fluids like soy or stout was a cause) to no liquids. To the amount of time spent 'under vacuum' all not making that much difference. Less time seemed to lessen it but, you should be able to cook meat indefinitely without any internal oxidization occurring. Otherwise how is Thomas Keller doing 72 hour short-ribs that are cooked medium? So soon after posting he piece I got me some duck breast, et voila! Perfect medium-rare, so what's the craic Jack? Only variable left to explore was the meat itself and then I got my answer. You see, I'm not a rich man by any means (form an orderly queue ladies) so that affects my food shopping. Chicken legs: half price? You bet! Ribeye from questionable sources: 60% off? Count me in! But the thing is, the same thing would happen even with what the supermarkets claimed was 'their finest 21 day aged Angus'. I went into the best butcher I knew, got a striploin that was €10 more per kilo then what I would pay. Bagged and cooked it. In a word S-U-C-C-E-S-S. Finely the €800 egg cooker was doing what it was meant to! Because the places that are using and experimenting with sous vide are generally pretty well-funded and high-end, you can bet their ingredients are equally top notch. Hence, it's not surprising theirs never been the book, 'Sous Vide on a Budget' After all I can't imagine Marcus Wareing getting a KP to run down to Tesco for some back-up lamb chops. But this discovery leads to the unsettling matter, why does this happen to supermarket meat? It's a question I'm sure there's an answer to it, but whether I really want to know is a different matter entirely. Your thoughts people. . . .

Ribeye steak, cooked for two hours at 56 degrees C.


What? You didn't know I was on Facebook. Well now you do!

Tuesday, March 22, 2011

Stout, Steak and Sous Vide

Stout and Sous Vide Steak with Stew Garnish


I know it’s a cliché to say, but I’ve never won anything. Having spent my schooldays committed to mediocrity and inexcellence, prizes and accolades were about as rare as a designated driver on Paddy’s Day. Actually that’s not true, when I was ten I won the Wilson Cup for junior acting for my part in Rumpelstiltskin. Which may as well have been the award for Knowing All Your Lines, Getting Through Your Part With a Clean Nose And Not Spending The Entirety of Your Time on Stage Looking For Your Parents Amongst The Crowd, but would’ve meant the engraving be the same size as the cup.  However two weeks ago I get a call in work from the MD of Eurolec, saying that after putting my name in the draw at their stand at the Catex Expo last month, I was now the proud owner of a Grant SV100 immersion circulator. . . .I will now pause for moment to bask in your collective envy. For those of you not taking a moment to contemplate how life has been nothing but a serious of misfortunes and let-downs while muttering, ‘some people have all the luck’ under their breath’s, you’re probably wondering what the hell it is and what it does. You, and nearly every single staff member who’s walked through my section and seen this piece of kit. Which is funny, given that a staff of a dozen cooks that total nearly half a century of experience, the resounding response to, ‘It’s an immersion circulator.’ is a blank stare followed by ‘How much does it cost?’ ‘If you were to buy it, about a grand.’ A curse word is then usually muttered followed by a shake of the head. Occasionally the odd one will not be satisfied by this and will ask what it does. Which by itself warrants a fairly straightforward answer, but the whole point of this piece of equipment is not so much what it does, but what it allows you to do. And that is a whole other matter entirely.


Chicken leg with herbs and star anise,
before.

First off, essentially all an immersion circulator does is heat water, that’s pretty much it. (My housemate’s response, ‘So it’s a really, really expensive kettle?’) But as it heats water it keeps it moving to regulate it to an exact preset temperature. It will keep this temperature to .01 of a degree and hold it indefinitely, days if needed. That’s what it does, now for the other matter. The matter is called Sous Vide, and if you’re not familiar with it then prepare yourself to join to ranks of the informed.


After 3 hours at 70 degrees C.

Sous Vide is the most common application in the kitchen that this device is used for. This translates as ‘under vacuum’, the item you wish to be cooked is placed in plastic bag, the bag is then vacuum-packed to remove the air within it. It’s then placed in water heated to a precise temperature. No doubt a lot of you will have seen this been done on TV at some stage. I was explaining it to one of the girls in the office, after a moments realisation she blurted out, ‘Oh yeah, that’s that thing that guy did on Masterchef.’ There’s no doubt that the use of Sous Vide cooking has become increasingly widespread of the past ten years. In truth it is no longer seen as a radical, avant-garde technique. Used only by those practicing the dark art of *hisses* ‘molecular gastronomy’. But now chefs are viewing it for what it is, just another way of doing something. The same way the microwave is an alternative to heating something over an oven. And a stick blender is an alternative to a bowl and whisk. Proof being that even the old school titans of classic high-end French cookery, namely Ducasse, Robuchon and Thomas Keller have all relented and have all fully implemented it into their multi-Michelin starred kitchens around the world. Keller even wrote a book on it. So how and why does it work? Not to procrastinate, but before we answer this we need to address something else. As the most common use of Sous Vide is to cook meat, in order to understand how cooking in this manner is different from conventional methods, we need to understand a few points of what happens to meat when we cook it.

High humidity meant I wouldn't get crispy
skin ,so baked  it separately between two
baking trays.
Doneness: I don’t mean to dissuade you but there are experienced chef’s that have been cooking steaks for years that will not be familiar with what I’m about to say. You see, when you cook steak in a restaurant or at home, gauging i’s doneness be it from rare – well done, is determined by feeling. You can press it as it cooks and judge by its resistance. Alternatively, chefs would stick a metal skewer in, leave for 5 seconds, pull out and rest it under your lip. If it’s slightly warm, it’s rare-medium rare. If it’s roasting hot it’s well done. The idea is that the metal absorbs the internal heat, therefore the temperature you feel is the temp inside the meat. (For this reason I find an instant-read digital thermometer to be indispensable.) But what most people don’t consider that different levels of doneness occur at different temperatures. Example, rare is about 45-50 degrees C, medium is between 60-65 and well is past 70. So if you’re cooking a piece of meat and you want it a certain way, you cook it until the core reaches the temperature required. So traditionally you put it on a hot pan or bang it in the oven. But even if you want it well done, both methods involve the item been exposed to temperatures greater then you want it to ultimately end up. The result is that, say you cut your steak after it’s been cooked and look at the inside, the core may be exactly as you’d like it. But moving out from that they’ll be areas around it that have gone passed the desired temperature in order to cook the core sufficiently. So while most of your steak is spot-on, nearly a third of it is technically overcooked. Also when you get a steak or chop that hasn’t been evenly cut from the joint you can end with uneven cooking, as one part of the item is thicker than the other and so requires longer cooking. So half of your steak is fine but one part is overcooked. Now, can we kind of see where this is going?


Skin cracker, boom!
By having an item cooking in an environment where the temperature never exceeds that of the desired doneness (such as, say, water been heated by an immersion circulator?) all issues named above are simply, no longer issues. I want a piece of meat cooked medium, you set the machine to 60 degrees, drop it in and that’s it. The result is a piece of meat that, when sliced, is perfectly cooked and completely uniform in colour from end to end. This also near-eliminates another pitfall in not just meat cookery, but cookery in general: overcooking. ‘How long are you going to cook them for?’ The German asks me as I drop in marinated chicken livers, rolled into a sausage-shaped tube, ‘I want them about medium-well. Gonna give them bout an hour and a half.’ ‘An hour and a half, for medium-well! But zay will overcook!’ I then explained (again, to my SOUS chef) that because no part is exceeding the temperature desired, traditional overcooking is just not possible. That’s not to say stuff can be left there forever as a kind of tenderisation occurs and that doesn’t work for tender cuts such as chops and steaks. Also I’ve noticed on occasion that prolonged cooking in steak has caused them to oxidise internally, though still fine to eat, just doesn’t look that appealing. However the fact that adding ingredients to the bag with your item, allow it to be continually marinated as it’s cooking and not just before. Allowing a multitude of opportunities to add and impart flavour.

Borrowed some stuff from the garnish section: Chicken Leg cooked Sous Vide with
wild mushrooms and skin cracker.

Lastly there is one big advantage to this technique and for that we need to get slightly technical. Meat and fish are comprised mainly of protein. Yet the thing about protein and protein strands is how they react to heat. Mainly the fact that past the temperature of 85 degrees C they begin to contract. This has implications when it comes to cooking meat. As we’ve said, traditionally cooking meat requires high temperatures. The result is that areas that have exceeded this temp, the protein strands have contracted. The reaction causes moisture to be essentially squeezed out of the meat, like wringing out a damp cloth. And that, ladies and gents is why overcooked chicken is dryer then Mormon’s 21st! This relates to my funky egg post. Eggs of course been stacked with protein, having them cooking at low temp results to completely different texture.

Last week saw St. Patrick's Day, which I shockingly spent in work, during which I learnt that there are few experiences more soul-destroyingly depressing to an Irishman. Anyway I brought Grant home and decided that I would make some homage to the day it was. Beef and Guinness Stew is one of the more well known strings in the Irish cusine bow. Traditional Irish dishes are hard to pin down, apart from, take a British dish replace everything that isn't meat with pototes. But this one is a belter. Here I decided to refine it by replaced the diced stewing beef with striploin steak, which was cooked Sous Vide in herbs, garlic, stout and stock. The garnish here is basically a traditional stew minus the beef which doubles as a sauce. Unconventional? Yes. Clever? Maybe. Pretentionus, while trivialsing the culture and history of our great nation? Pretty much, but that's the advantage of actually being Irish, not just your Grandmother.

Stout and Sous Vide Steak with Stew Garnish
1 striploin steak, approx 200-300 grams
500ml can of Irish Stout
2tbsp chicken stock
2-3 sprigs of thyme
1 clove of garlic, peeled and roughly chopped
1 decent sealable freezer bag

1 small red onion, finely sliced
2 rashers of streaky bacon, cut into lardons
3-4 button mushrooms, finely sliced
1 medium roosterpotato, cut into large dice and blanched until nearly done
1½ tbsp plain flour, add more if needed
½ cup of beer or chicken stock
small knob of butter, 10-20 grams
2 tbsp of finely chopped parsley

  1. Set water bath to preferred temp.
  2. Place the steak, thyme, garlic, stock and about 150ml of the stout into the bag.
  3. 
    Sealing the bag
  4. Work all the air bubble out from around the steak. To seal I use the David Arnold method of home-vacuuming. Fill a basin or pot big enough to submerge the bag in with water. Seal the bag all the way till about 1” from the end. Hold from this opening. Place the bag in the water, keeping just this opening above the surface. With your other hand push the last of the air out, the water pressure should take out most of it. Carefully close the last of the seal.
  5. Place into water bath. Leave for nearly an hour but not more than two.
  6. Fry bacon on high heat with a tbsp or two or oil.
  7. When they’ve got a bit of colour, turn down the heat to medium and throw in the onions.
  8. After about 3-4 minutes add the mushrooms.
  9. Stir in the flour and after a minute add about 150 ml of the remaining stout.
  10. Drink remaining stout.
  11. Bring to boil while stirring, add stock and bring to boil.
  12. Add potatoes and most of the parsley.
  13. Reduce until desired consistency. Take off heat and stir in butter.
  14. Take bag from the bath and let sit for about 5 minutes.
  15. Remove from bag and pat dry. If you want the liquid in bag can be adding to the ‘stew’.
  16. Get a frying pan on a high heat and let warm for at least 5 minutes so it’s screaming hot.
  17. Season steak with salt, pepper and a little oil.
  18. Sear for no more than 15 seconds on each side. Remove from heat.
  19. Place the stew garnish in middle of the plate. At angle slice the steak and arrange on top. Sprinkle with parsley and serve.


Like the blog, like the page! Now on Facebook.